This article was originally written in Hebrew and published in ITCB‘s Testing World magazine on October 2023.
Introduction
Provengo is a software testing and planning tool based on models. Model-based testing is a slightly different approach from what we are familiar with today. At its core is a model that efficiently describes the required behavior of the system being tested.
Using this tool, instead of creating individual tests or test scripts, we create and maintain a model that generates test cases for us. In essence, it provides a mechanism for generating test scripts.
The model consists of various components. Some parts of the model can be developed using low-code tools, while others require actual coding knowledge. The coding language used for working with Provengo is based on JavaScript.
Features
- Measurement coverage that can be adjusted by test scripts.
- Visualization of test scripts in a graphical format.
- Export of test scripts to Excel and JSON.
- Conduct tests for product business requirements, including conflicts between requirements, regulatory violations, incomplete business processes, and more.
- Reduced maintenance of tests – both manual and automated – to a minimum. This is because every change or update to the model generates new test scripts.
- Low-code tools and user interfaces that allow even non-coders to utilize the tool.
Now, let’s start with the basics, such as the installation process, creating a model, and turning the model into an optimal testing plan tailored to our testing needs.
Installation
Installation instructions can be found on the Provengo documentation portal.
To use Provengo, you will need:
- Java, version 11 or later. Make sure to add JAVA_HOME to your environment variables. The Java installation process usually includes an option to update environment variables, so make sure to check that box.
- A terminal or another command line tool.
- Graphviz for generating graphs.
- Selenium Server (Grid) and a browser driver for Selenium for automated browser testing.
- The Provengo system, which includes two files that should be saved in the same directory:
- Download the Provengo file and rename it without the date to “Provengo.uber.jar.”
- Download the appropriate executable file for your operating system.
➡ Open your terminal from the directory where you saved the files and run the following command
(the command depends on your operating system):
– `./provengo.bat` or `./provengo.sh`
You should now see some output in your terminal with the word “Provengo.”
That’s it! You have all the components of the system installed.
Opening a Provengo Project
To open a new Provengo project, type the command `provengo.sh create` in your terminal and give your project a name. The system will prompt you with a few questions for initial project setup: project name, whether to initialize a Git repository, and whether to add your AI files (which assist in automated completion for tools like Copilot and Tab9). Simply press Enter for each question.
At the end, you will receive a message that the project has been successfully created along with its path.
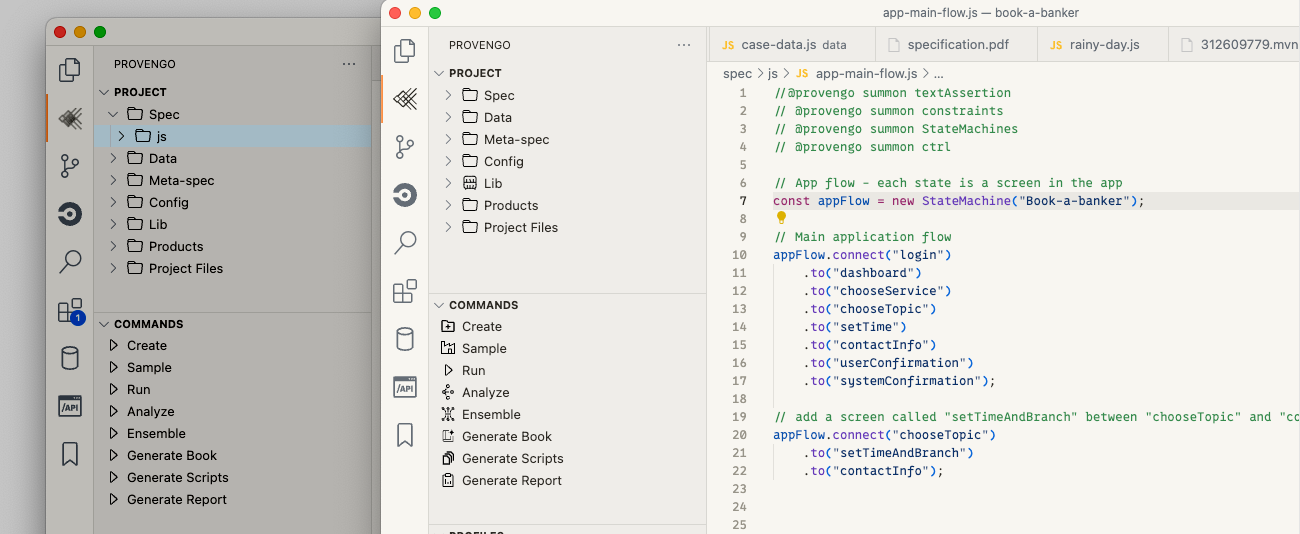
Open the project in VSCode or an editor of your choice. The project contains several folders and files that serve as a starter kit for working with the tool. Additionally, there is a Hello-World project for demonstration purposes.
Project Structure
In the sample project, we’ve enriched the classic hello-world example. The tool generates possible scripts for different greetings for different celestial bodies. If we find a script that includes the combination of the greeting “hello” and the celestial body “world,” we ask the system to mark it with “Classic!”
- In the “spec” folder, you’ll find the “js” folder containing files relevant to execution.
- In the “data” folder, under the “data.js” file, you can find the array of possible greetings.
- The “config” folder for project configurations.
- There’s also a “lib” folder where you can add your own code libraries.
- The “meta-spec” folder contains files used for creating test scripts, optimizations, and exporting tests to various scripts and formats (e.g., exporting to Python or Excel).
- Tip: It’s common to add a subfolder named “disabled” in the “spec” folder. This allows you to easily enable or disable specific components from the test model by dragging them to or from this folder.
Return to the terminal and use the “analyze” command.
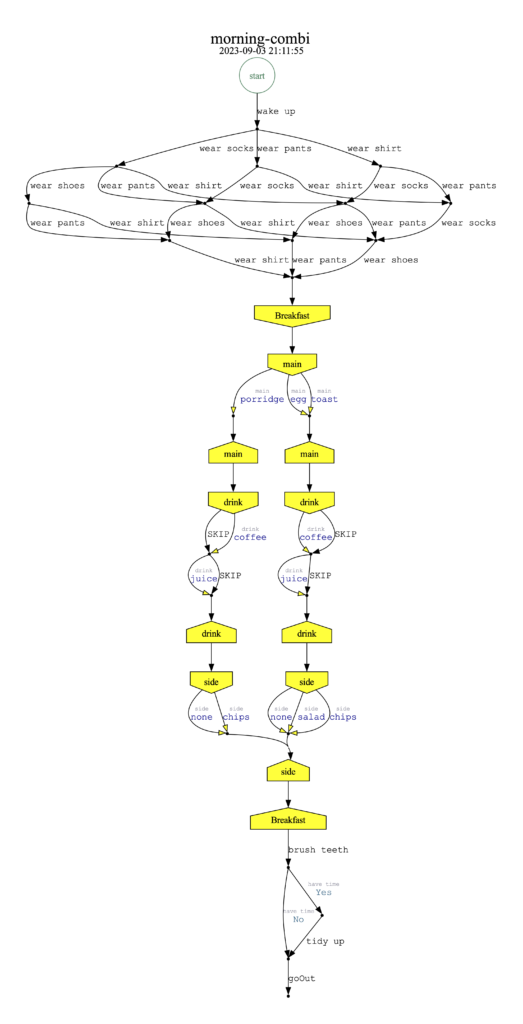
% provengo analyze -f pdf testing-world-exampleWe ask the tool to generate a graph for us in PDF format. This graph illustrates all possible paths and their different combinations, creating all the test scripts, and it’s called the “testing space.”
The new file will be created under the “products” folder and will open immediately.
Let’s delve into a more interesting example. In this example, we perform tests for a morning routine management. For this purpose, there is a demo site where you can also perform automation. Due to space constraints, we won’t go into the code details here, but the writing is similar to what we’ve seen so far.
Readers are invited to install Provengo and play with the code from the GitHub repository.
In our “js” folder, there will be a file containing the basic project flowchart:
- Wake up.
- Get dressed.
- Brush teeth.
- If there’s time, get organized.
- Finally, leave the house.
➡ Return to the terminal and request Provengo to generate the testing space graph for us.
Again, using the “analyze” command, specify the desired format, and then the project path.
% provengo analyze -f pdf morning-combiAnd here is the generated graph:
An illogical scenario: Locking shoes before putting on socks.
The path marked in red represents a scenario where the user locks their shoes before putting on socks. This is obviously an illogical situation – you can’t put on socks after locking your shoes. But what does this “illogical” situation mean in terms of the testing plan? In regular test planning methods, there are two possible interpretations:
a) Illogical – no need to test it.
b) Negative testing – checking that the user cannot perform the action.
In model-based testing, there’s a third possibility that we’ll explore shortly.
1. Let’s assume it’s an illogical case, so there’s no need to address it at all. We can add a file to our “js” folder that contains the code describing the prevention of locking shoes until socks are put on.
Once again, we run the analyze command and receive a new graph.
➡ You can see that the option to lock shoes before socks have been removed from the graph, while all other path options remain. We’ll drag the file into the “disabled” folder and move on to the next option.
2. Try to lock shoes before putting on socks and fail (negative testing / rainy-day).
We’ll add a new file to the “js” folder that handles this case. In this file, there will be two blocks:
In the first block, we wait for the selection of socks, and if we receive shoes first, we want to report a failure.
In the second block, we attempt to put on socks after shoes, which will result in failure.
➡ As you can see in the graph that was generated, we received all the cases in which it will attempt and fail.
3. Unreasonable Requirements
So far, we’ve seen two options that exist in non-model-based testing: assume that there’s no need to test the case or test it and see that the user is blocked. In model-based testing, there’s also a third option: to test the requirements themselves. In this case, if the model allows a scenario where you put on socks after shoes, then there is a requirement bug. In such a case, you need to work with the person who defined the requirement (product or customer) and correct it. All of this can happen before you even start developing the feature.
Returning to our example, we’ll add the following code that will mark cases in the graph where we chose to put on shoes before socks.
In the left half of the graph, the cases ending in a red box represent the paths in which we violated the requirement “It’s forbidden to put on socks after wearing shoes.” To understand how the user can reach this violation, we can follow the sequence of actions from “start” to one of the red nodes.
Low-Code Tools:
These are user interfaces that allow manual testers and product stakeholders to use the tool without needing to write code.
Now, we will add breakfast management to our morning routine main flow. We can do this using a VSCode extension called Combi. To download it, you can find it in the VSCode extensions marketplace and install it.
We fill in the Combi file with the fields that define breakfast management:
1. Fill in project information.
2. Fill in the fields:
- Main course can be an egg, yogurt, or toast.
- Beverage – coffee, juice, both, or none.
- Side dish – salad, chips, both, or none.

3. We’ll add a constraint: If the main course is yogurt, the side dish cannot be salad. (It’s important to note that this constraint is for the sake of the example only, and the authors encourage eating salad with yogurt for breakfast in real life.)

We will run the “analyze” command again, and we will receive an addition to the existing graph.

Creating a test program based on a model involves multiple options, each tailored to the specific testing needs and requirements of your project. Here’s a summary of the three main approaches:
1. Direct Model-Based Automation:
- Develop test scenarios and cases directly from the model.
- Use an automation framework or tool that can interact with the model.
- Implement automation scripts to execute the test cases by following the model’s instructions.
- Execute the automated tests using the chosen automation tool.
This approach allows for end-to-end automation with direct connections to the model.
2. Third-Party System Automation:
- Develop a package of optimal tests using Provengo by listing the desired actions to be tested.
- Generate a large number of test samples from the model using the “provengo sample” command.
- Create a test package by running the “provengo ensemble” command with the required package size.
- Provengo uses advanced algorithms to generate test packages covering the maximum number of actions listed.
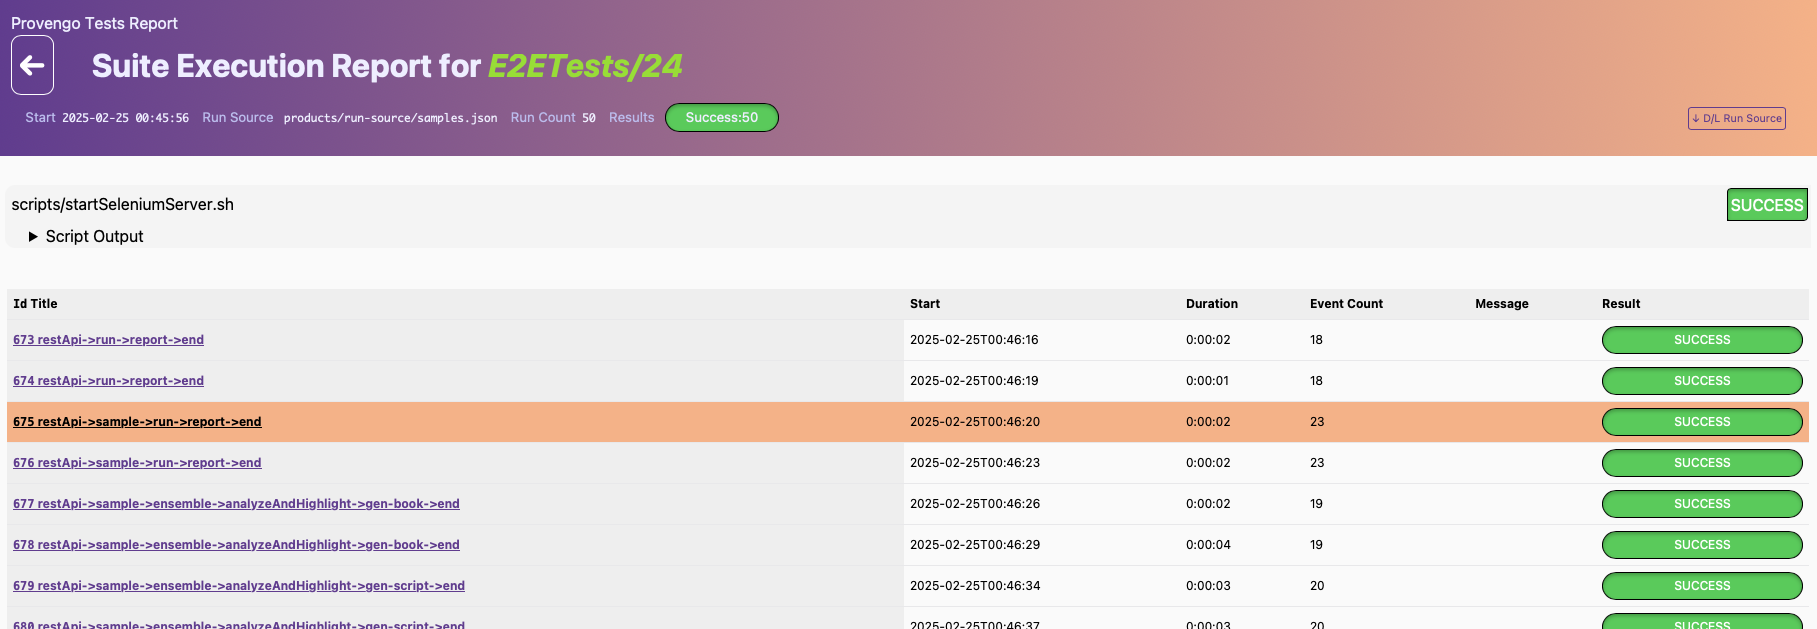
- Use third-party automation systems (e.g., Selenium Grid) to execute these tests.
This approach leverages existing automation infrastructure and tools.
3. Manual Test Script Generation:
- Create test scripts manually based on the model’s instructions.
- Write test cases that guide human testers through the application, following the model’s guidance.
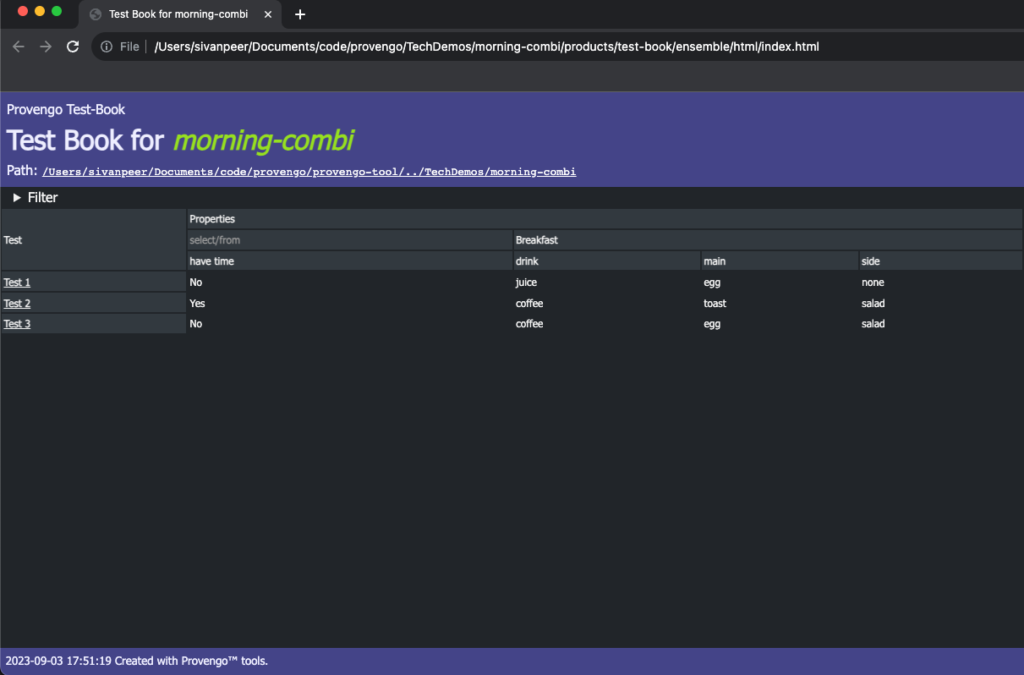
- Develop an HTML-based static website with test instructions and an index page for filtering and managing tests.
- Export test scripts to an Excel file for manual test management and execution.
This approach is suitable for scenarios where manual testing is preferred or required.
The choice of which approach to use depends on your project’s specific requirements, existing infrastructure, and whether you prefer automated or manual testing. Each approach has its advantages, and you can select the one that best suits your needs. Additionally, it’s essential to maintain and update your test program as the application or project evolves to ensure continued testing effectiveness.

Advantages:
- Test maintenance is minimized. The model generates tests anew with each change or update to the model.
- Updates are easily implemented.
- Improved and measurable functional coverage because the model enables examination of all possibilities.
- The QA professional works closely with the Product team, allowing them to perform tests according to their requirements
Conclusion
In conclusion, this discussion has shed light on how provengo is using the dynamic landscape of test program creation, with a primary focus on the utilization of model-driven testing. The three distinct approaches outlined – Direct Model-Based Automation, Third-Party System Automation, and Manual Test Script Generation – offer a spectrum of options to cater to diverse project requirements and testing preferences. The advantages of this model based testing-driven approach, such as minimized test maintenance, streamlined updates, and comprehensive test coverage, underscore its potential to transform testing processes. By bridging the gap between Quality Assurance, Dev, VP R&D and Product teams, model-driven testing emerges as a powerful tool in modern software development, enhancing efficiency and overall testing effectiveness. As the testing landscape continues to evolve, embracing these approaches may prove invaluable in delivering reliable and high-quality software products.
>> To continue the discussion, join our Discord Community- HERE


